In the old platform debates, Apple security was always featured as a primary selling point. The truth is technology has caught up to the giant and frankly - a lot of people are simply not using all the existing Mac OS X security tricks of the trade.
Hackers tend to look for the "low hanging fruit", but they also need enough trees to run through. Until quite recently, there just wasn't a large market for hackers in attempting to exploit Apple security. The combination of unfamiliar OS transfers who want something easy to use and are willing to purchase a luxury good, have come together to produce a decent niche for shady hacker types. Luckily most Mac's already have the functionality you need, it just takes familiarizing yourself with the settings that lie just beneath the surface. In this blog post we'll run down the top security holes you may have open, then how to quickly and permanently close them so you can cross fixing your Apple security settings off your list!
So Apples aren't inherently secure? Are you calling Apple a liar? No. Not at all (my lawyer suggested making that point clear) - really it's not that Macs are ultra secure, it's that Windows computers are horribly insecure. A long time ago Windows traded ease of use for security and they've been dealing with the repercussions for the last decade. Granted Mac's OS has always been "closer to the kernel", but it's largest security benefit may be that it has avoided all the mindlessly self-installing \/ bloated apps that have frustrated Windows ex-pats. With that in mind, we will avoiding adding more applications to tighten security up and simply use what have more wisely.
Top Tips for Apple Security
Now that we've clearly defined the problem, let's take a look at how to combat it. I've split these tips up into 3 sections - General Apple Security Settings, Network Settings, and Application Settings. Our goals in each of these sections will be to make your computer difficult for public users to access and to make the data that your computer does transmit useless to people who may intercept it.
General Apple Security Settings
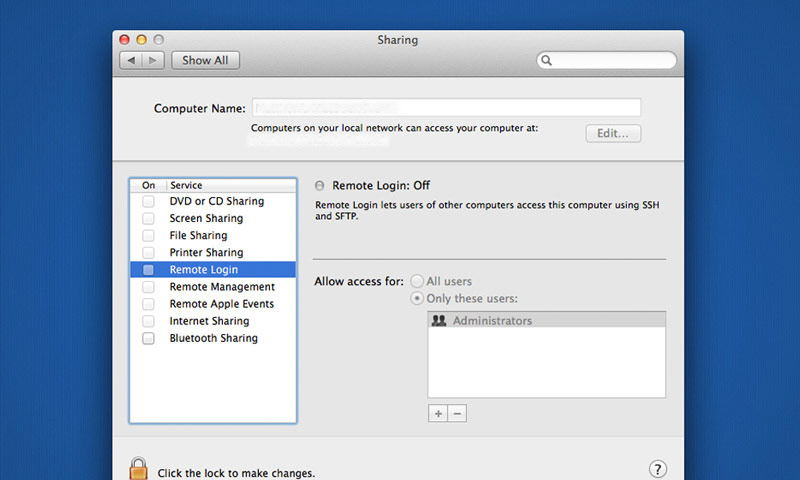
Remove Unused Apps / Disable Unused Functions: If you're not using an app, why keep it around? If you’re not using an advanced feature, why leave those ports open? Selecting the superfluous apps will be up to you, but there are certainly a few functions worth checking in on - Screen Sharing, IPV4, Airport, and Bluetooth for example. Each are easily accessible through System Preferences > Sharing and System Preferences > Network, but as a general rule - Unless you're 100% sure you need something enabled, you most likely don't. Disable everything to be on the safe side, test things out, and always remember that you can enable specific rights easily if you do run into a circumstance where you need them.
Create a Non-Admin User: Once you've opened up the box and setup a user, most Mac owners never see that user setup screen again... to their own detriment. Think about it this way - Why use an Admin user, when 95% of the time you don't need all the access it allows? This is an easy fix and will lower your risk significantly. Even if your computer is compromised it will only require a patch, as opposed to losing everything if an admin level user has been compromised. Creating a "Non-Admin” user is easy - Start by navigating your way to System Preferences > Users & Groups, then click the plus icon on the left. Set the user to ”Standard”. instead of ”Admin”, and you're good to go. Login with this user as much as possible and then simply hop over to your admin user if you need to handle higher level activities.
Keep a Backup: I'm slowly becoming convinced that you need to actually get hacked before you learn how valuable a backup can be. As someone who has dealt w/ hacking, let me tell you - It's not fun. The truth that you'll rarely hear from a web professional is this - If a hacker really wants something, they'll usually get it. It's a tradeoff assessment. If your server or computer is ever compromised, the most comforting thought you could possibly imagine is knowing you’ll only lose a few days ...as opposed to losing everything. Forever. If you locate System Preferences > Time Machine you'll see Apple's built in backup feature. A little testing has shown me that allowing constant updates occupies quite a bit of memory. Setting timed backups can also be a little annoying, since it seems like you've always got 3 projects open when it triggers. For an occasional planned backup though, there’s really nothing better then Time Machine. It's reliable and relatively easy to use. What more could you want out of a system-wide backup?
Network Security Settings
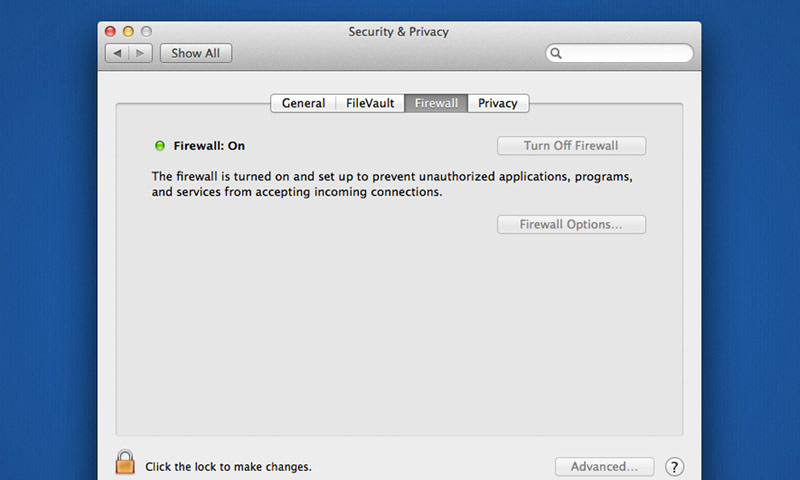
Enable Your Firewall / Maximize your Privacy: Navigate your way to System Preferences > Security & Privacy and you'll find your basic privacy settings. Enable your Firewall across the board and set any application specific exceptions you might need. If you’re looking for enhanced security, you can enable FileVault, but in my experience that functionality puts a heavy drag on day-to-day usage. FileVault is designed to encrypt your data on the fly and provide you with a backup key in case you need it. While you're there you should also inspect the Privacy tab to ensure that unnecessary programs are not accessing your contact data and/or location. Very few applications truly require your location, so it's best to pare those down as much as possible. From a users perspective sending that data provides a pretty low reward, but to a hacker it can be a gold mine.
Put Some Thought into Your Network: When you setup your WiFi network, there are a litany of options. Most users see all those options relating to a complicated topic and get overwhelmed. Most people I know are just happy when they can keep their WiFi working, but a tiny amount of effort here can pay off huge in terms of added security. Every network has needs that are individual, but some rules apply across the board. Your WiFi setup generally depends on your router, but most aspects can be viewed through System Preferences > Network There are few reasons to EVER have an "Open" network, so require a password and make it relatively complex (10+ digits with a variety… you know the drill). Setting your security to WPA2 is your best bet for a high level of security that isn't too difficult to setup. If you're looking for the ability to allow specific devices, I'd suggest looking into allowing network access based on Timed Access Control (Tutsplus - Timed Access Control on Airport) or Utilizing 802.1 functionality. It takes a little work, but knowing exactly who can access your network narrows down your possible exposure a ton!
Utilize a VPN: Detailing the setup of a "Virtual Private Network" is beyond the scope of this post, but it's quickly becoming a requirement for anyone wanting to do work on the road. Here are a couple articles that cover the topic very well - Lifehacker & Apple. In principal a VPN connects to another server or computer and creates a temporary link to each other. The traffic is extensively going from one device to another, then out to accessible resources (internet, media, mail, etc.). This linkage is generally referred to as a "tunnel", which is a useful way of thinking of it's primary security function. When an outside party attempts to access this tunnel, the whole thing collapses. Like a hole springing a leak (my least favorite driving based fear) a small breach in security collapses the entire connection. Your remote VPN settings can be accessed from System Preferences > Network, then either adding or editing a connection on the left (L2TP over IPsec is your best bet). You will want to keep a couple things in mind regarding VPN.
Unless you're pretty network savy, you'll probably need to pay for this service (I’ve heard good things about ExpressVPN & StrongVPN). If you are capable of setting up your own connection (w/ an old computer laying around maybe), you need to keep three big things in mind. First - It's awesome to access your home data securely from public WiFi. Seriously. Second - If your home network uses a dynamic IP, you'll need to add another tool to track and redirect that IP change (DynDNS is pretty solid on that front). Third - you'll want to keep in mind that the connection speed is based on where you're connecting to and from. If you have a slow network at home for example, the connection can’t really be that fast. This technology will surely be refined with time, but for now a slightly slow connection is just par for the course (which reminds me - Google Fiber, Please come to Raleigh! We need you.).
Application Security
Always Use SSL Email: It still baffles me that some people skip this step, but using SSL encryption on your email is really the most important step to keep your private information secure. If you use Gmail or your own server, securing your email literally takes a minute to setup and makes your email correspondence VERY difficult for intruders to read. Sending your mail through SSL is the difference between someone seeing your words exactly as you're reading them or needing to spend an hour to do the same thing. Unless you're being eyed by the FBI, you should feel comfortable knowing that your email is not seeing any prying eyes.
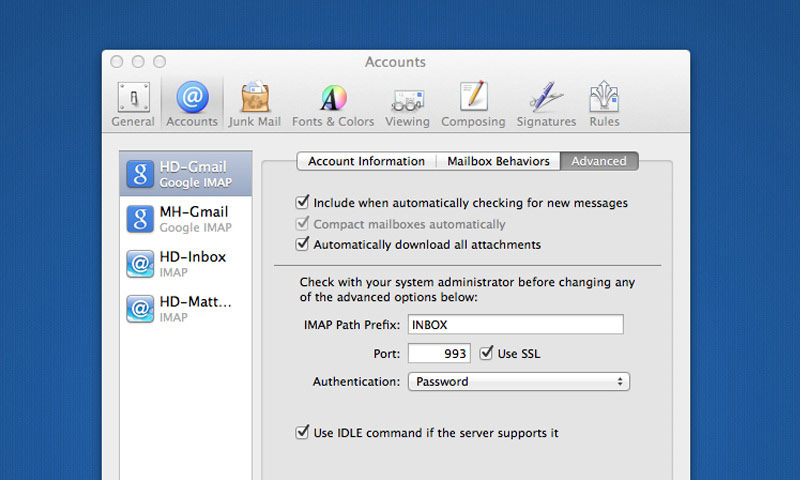
The easiest way to check and see if you're using SSL email is to go to Mail App > Preferences > Accounts. From there just select the specific account and click the Advanced tab. There's a button that clearly states "Use SSL" which should be checked. You'll also notice the port being used - which in most cases should be 993 (depending on your server setup of course). That piece will ensure that your incoming mail is using encryption, but you'll also want to ensure that your outgoing mail is secure too. To do this, click on the Account Information tab and select the Outgoing Mail Server dropdown and click edit. Each mail account has a corresponding Outgoing Mail Server, so again select the one you'd like to review and click Advanced. You'll see another obvious Use SSL checkbox, make sure it's checked. Once you've got everything setup send a quick test email and if you see no errors, you should be good to go. The same basic process should be established on any mobile devices you have (phone, tablet, etc), although the ports are most likely different.
Disable Flash and Java: Few applications give more problems and provide more negative exposure then Flash & Java. Each have their own icons under System Preferences and at a bare minimum, you should turn off their "Auto-Update Feature" and disable Flash in all your browsers. Both applications (Flash especially) habitually release updates w/ glaring security holes. I have opted to get rid of both altogether, but you may want to keep Java enabled to get a “full web experience” until html5 standards really kick in (5 years or so). Like other aspects you're trading some additional functionality for "piece of mind", but the balance has turned on both applications and Flash for one looks to have a very bleak future.
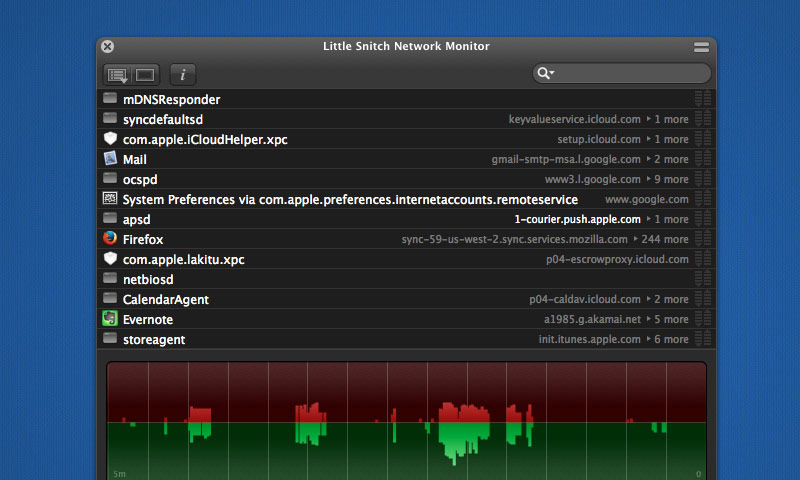
Use Little Snitch: Let it be known, I have a general apprehension toward using an application to add functionality to an OS. In my mind - using an OS efficiently will usually offer you all the functionality you could possibly need. Little Snitch is the one exception to that rule. This application runs relatively thin in the background (meaning it doesn't use a bunch of memory) and prompts you anytime your computer attempts to send data out. Then with one click you simply assign specific rules to different apps. Basically - Little Snitch allows you to identify and permit any data leaving your computer which helps your overall Apple security on several fronts. Obviously - you can keep data from traveling anywhere it's not intended, but more importantly it allows you to gain a deeper understanding of how the system operates. If you visit Objective Development's website you'll notice that they also offer a free trial so you can get your feet wet.
Keep Up to Date: Keeping your OS and applications updated is an important aspect to keep in mind. The hacker community operates like any other and when a vulnerability is exposed, it's generally tested out. Your OS can be set to automatically update under System Preferences > App Store. Personally I'd recommend automatically checking, but not automatically installing. It rarely happens, but there have been occasions where Apple will come out with an update that isn't perfect then quickly followed by another. My approach maybe overly cautious, but waiting a day to update your OS doesn't make a huge deal and can help you avoid the occasional slips that can occur in the update posses. It's also a good idea to set your "Allow Apps Downloaded From" to "Mac App Store" under System Preferences > Security & Privacy.
Give Yourself a High Five!
If you've successfully checked the previous notes, you should feel much better about your setup. Like anything else in tech - security is an ever evolving field, so certainly stay up to date on breaking news. These are a few resources I’d recommend bookmarking if you’d like more info on the topic - Apple's Product Security Web Page & US-Cert.
If you have a comment or think there's another tip worth noting, please feel free to leave it in the comments below and I'll include it in a future update. If you'd like to delve a little further into the subject the links and video below should be a good jumping off point. Thanks for stopping by and if you think this info would be useful to a friend or client, we'd certainly appreciate you sharing it on any of the socials with the links below.
