Efficient workflows and workflow patterns are key to effective web development. Learn how to streamline your workflow with this web development tutorial.
Most developers I know are hands on learners
. The type of people who take things apart to understand how they work. While that approach is useful for garnering a deep understanding, it's not very conducive to retaining a comprehensive development approach. If you pick up tools here and there, you may eventually end up with an amazing array of tools... but you probably also have a messy workbench. Rethinking and refining your workflows and workflow patterns will ultimately give any developer a framework in which they can work most efficiently. Ultimately when your dealing with lots of code on a regular basis, efficiency is the name of the game.
Optimizing your Web Development Workflow
It's important to keep in mind that workflows will always be unique to the user. The key factors I've kept in mind in with these suggestions are that everyone should be using tools that are unobtrusive, future-proof, device agnostic, and time saving. I've split these time savers into three categories and included detail and a simple workflow diagram for each. In order from least to most difficulty - Operational Streamlining will cover Applications and day-to-day tasks (Syncing Notes, Invoicing, etc.), Web Development Workflow will cover your basic local and remote servers (MAMP, Code Editors, Git Workflow, etc), and Command Line Utilities will cover core level time savers (Node, Bower, Grunt, etc). Now that we've got our scope, let's get cracking.
Operational Streamlining
-
Sync Your Email: If you are still using POP email, stop immediately. Any modern email service offers both POP and IMAP. The difference between the two can be boiled down to a simple statement. POP keeps a copy of an email on each device, while IMAP just keeps one. You can always use your settings to retain deleted emails if you're worried - but with the amount of devices we use nowadays, there is simply no reason to delete the same email on each device. This may come across as common sense to some, but streamlining your emails is a simple and guaranteed method of saving minutes a day.
IMAP SSL Setup - Stanford Pop 2 IMAP -
Get All Your Notes On The Same Page: If your brain functions well with "to-do lists", syncing your notes will make a huge difference in your day to day organization. The platform you select isn't as important as finding one that works for you. Keep in mind that you'll need an application that works well on all your devices (mac, pc, phone, tablet, etc) and updates simply. I think Evernote is tops in this field, but Clear, Remember the Milk, Google Keep, or even Apple Notes can get this job done for you. The key concept here is that you're notes will now be easily available across all devices. Keeping all your notes in one place is another insanely efficient time-saver that should be common sense, but I regularly see ignored.
Best Ways to Sync Notes - LifeHacker Using Apple Notes - MacObserver -
Setup Basic Invoicing: Most creatives treat billing like a
10 Tips to Invoice Professionally - Hongkiat Invoicing with Paypalnecessary evil
of conducting business. That said, you don't want to neglect your invoicing completely... it makes paying bills much more difficult. If you're looking for simple invoicing solution, you can use an application or a web based solution. The largest difference being that web based is usually more universal, whereas an application should allow more customization and automation. If using an independent application makes more sense for you - Lumina or Billings are worth your consideration. If you'd prefer a web based billing option - Paypal or Freshbooks will never steer you wrong. I recommend that all my clients setup a Paypal invoice template because even if you don't use it regularly, it's a bullet-proof backup option. -
Setup a Standard Contract: Another necessary evil is covering the legal side of projects. Luckily, you can treat your contracts much like any other document written in a foreign language. Start by getting an appropriate template - You can try Creative Docs or LegalZoom, but Google will probably offer you a few free options. Read and understand the words, then drop them into a simple themed layout. If you take a little time and build them out in Adobe Acrobat (or another pdf editor) your final product is a themed PDF template that allows you to fill out fields for each project on the fly. However you choose to compile the document, using an e-sign tool like Echosign or Docusign will then allow you to keep the entire process digital and legally binding. I can't promise you that contracts will become fun, but I can promise you that it will be a little less painful.
Standard Form of Agreement - AIGA Legal Guide for Designers - Smashing Magazine
Web Development Workflow
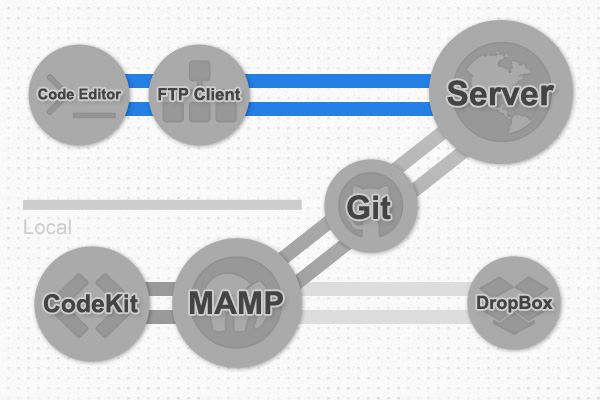
The exact setup you prefer is likely a little different, but we've included our workflow diagram to give you a basic approach. One constant is that you'll want to use a code editor / ftp client to communicate with your server. Another, that MAMP (or WAMP for you remaining Windows users) should be the core of your local testing environment. In our example, we've kept Dropbox as local backup and are utilizing Git to push revisions to the live server. Your approach depends on individual preferences, but these tips should be helpful for anyone.
Setup a Testing Server: Practice makes perfect and until you have your own testing server, you can't really practice
web development. I wrote a tutorial on the topic of setting up MAMP, but the basics can be achieved using any stack setup. All the elements are usually already installed on an Apple (and most other computers), but using an application like MAMP (or WAMP for windows) gives you everything you need and makes it much easier to setup. By having your own independent "internet", you can run tests on every bit and piece of a websites code. The most obvious benefit is that you can keep the actual website live while you're testing revisions, but it's also helpful that you can work offline.
Use a Quality Code Editor and FTP Client: We all remember using a bootleg version of Dreamweaver. We've all convinced ourselves that Text Edit is a "pure" way to manage code. The reality is a decent code editor may cost a couple bucks, but ultimately the small investment pays off very quickly. Take a look at Coda, Sublime, or Atom and you'll see what I mean. When it come's to FTP exclusively - Filezilla is still pretty solid. Most advanced code editors have "built in" FTP functionality, but if you need to manage a ton of files and would prefer to do so in a separate app, Transmit is worth giving a look. You can always ssh into your server, but that's a little more advanced then our current scope.
Keep a Backup in Sync: Having a backup on hand is always important. I wrote a tutorial a while ago about using a MAMP setup that syncs w/ Dropbox that would be worth a read. When done properly, you can both retain and use that backup with a local server for testing. Similar approaches can be taken with other backup products, but the basic idea with any of these is to keep a live version of your databases & servers easily accessible when you need to reach them, but secure from prying eyes.
Git Familiar with Version Tracking:Think of version tracking as keeping a snapshot of your files. If you want to revert a website that you're working on to the way it was built last week, version tracking is what you should be using. A Git workflow is obviously a little more complicated then that, but if you take a minute and watch the attached video - you'll know all you need to know. If you absolutely detest the methodology, you can opt to use Mercurial or Subversion. I personally believe Git has a brighter future, but that's more of a philosophical opinion then concrete fact.
Supercharge your Development w/ CodeKit: When it comes to bridging the gap between working with a GUI and utilizing command level
functionality, CodeKit is in a class of it's own. It's tagline says it all - It's like steroids for web developers
. Besides being a great way to integrate added functionality into your development workflow, CodeKit also introduces you to several command line concepts in an easy to understand way. Basically - it's not only a valuable asset to smoothing your workflows, it's also a great instructional tool. I'd highly recommend purchasing it, but at the bare minimum give the demo a try.
Command Line Utilities
Warning: Don't use command line utilities until you have a full understanding of what you're doing. You can do some major damage... Please Be Careful.
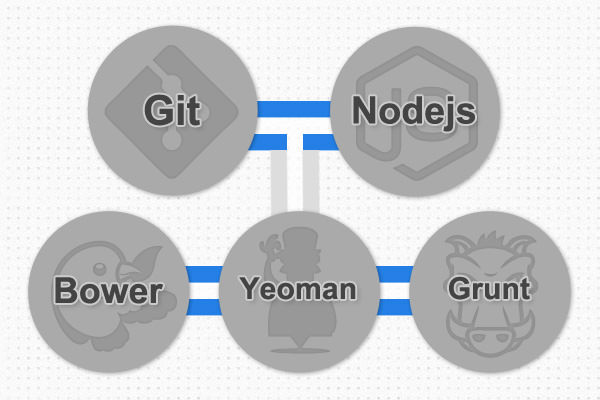
I have included a workflow diagram depicting the setup that we use around the office. When you get down to this level of streamlining though, every setup is truly unique. That said, these are certainly tools I'd recommend using or at least trying out. The first three I'll cover are intended to be installed at the core of your OS. Think of these as enhancements to your computer, whereas the command line utilities described later are enhancements used on a project level.
-
Git (Command Line)
Git was mentioned on the previous category, but the primary difference here is that you'll be bypassing the GUI and simply using the version control system from the command line. Folding in a Git workflow will save you massive amounts of time on heavily edited code, but it does take a little effort to set it up properly. When you run the install, Git will be placed in your usr/local folder and you'll see .gitconfig and .gitignore files (amongst a couple others) placed under your user directory. As you probably imagine, these are universal configuration files that setup how Git will function with a specific user.
Documentation Download -
Homebrew
Homebrew is a ultra-useful package manager that extends the functionality of any mac. Basically, Homebrew installs packages to their own directory and then generates symbolic links (symlinks) to the appropriate files in /usr/local. There are a few ways to install Homebrew, but I've found the easiest is to run the command listed below.
Documentationruby -e "$(curl -fsSL https://raw.github.com/Homebrew/homebrew/go/install)" -
Node.js
Node.js is an amazing cross-platform runtime environment that adds a selection of tools to your command line. It functions similarly to Ruby's Event function, but in this case we will just be using the NPM (Node Package Manager) command to include the utilities below. We're truly just scratching the surface here but if you want to step your developer game up to the next level, focusing on Node is a great way to do so.
Documentation Download
Let's Get to Work
Now that you have all the prerequisites installed, lets move along with the web development tutorial and address the command line streamlining utilities themselves. Don't forget that in order to add these tools to a specific project you'll want to cd into the folder you want to work with. This is an important distinction to make, so don't forget to relocate to your individual project folder before running the commands below. These tools are all device agnostic, but I'd also recommend using them remotely before trying them out on any live servers. As with the previous commands, you may need to sudo
the code too (9 times out of 10, if you see an error that'll be the cause). If you're unfamiliar with the concept check Apple's Documentation, but it basically just means typing "sudo" before your command and typing your system password to verify your admin privileges.
-
Yeoman
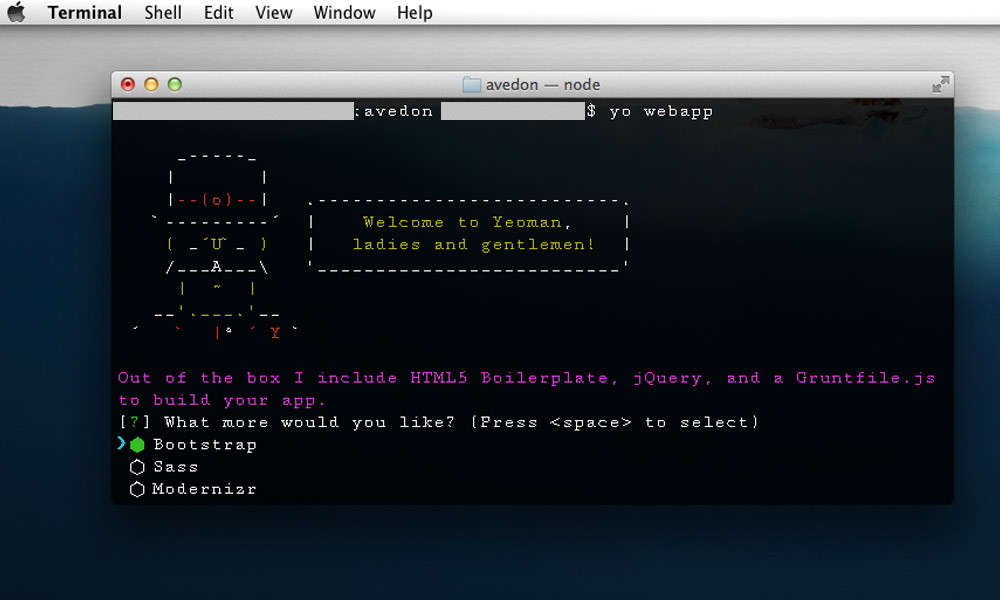
Yeoman uses the npm command to scaffold your project. It utilizes "generators" and basically simplifies the process of tying external packages to your project. The install command below will also install Bower & Grunt since they are dependencies (so feel free to bypass the next two installs if you install Yeoman).
npm install -g yoA basic scaffold can then be installed with:
npm install -g generator-webapp. Create a project with:mkdir my-yo-projectandcd my-yo-project. Then run it with the shortcut:yo webapp.Check the folder you assigned and everything will be installed and ready to roll for you - Pretty neat trick right?
Documentation -
Bower
Bower is managed by the talented team over at Twitter and once run generates a file named "bower.json". That file basically specifies the dependencies that your particular project will be using. Think of Bower as an ingredient list for the recipe that is your project.
npm install -g bowerOnce installed, finding and installing dependencies can be done easily. Run
bower search XXXto find the addition you're looking for. Runbower install XXXto add it to your project. Usebower listto see what you have installed in your project andbower update XXXto update that specific piece.Bower won't wow you, but it's not intended to. It's purpose is to keep track of everything and keep the pieces of your project up to date.
Documentation -
Grunt JS
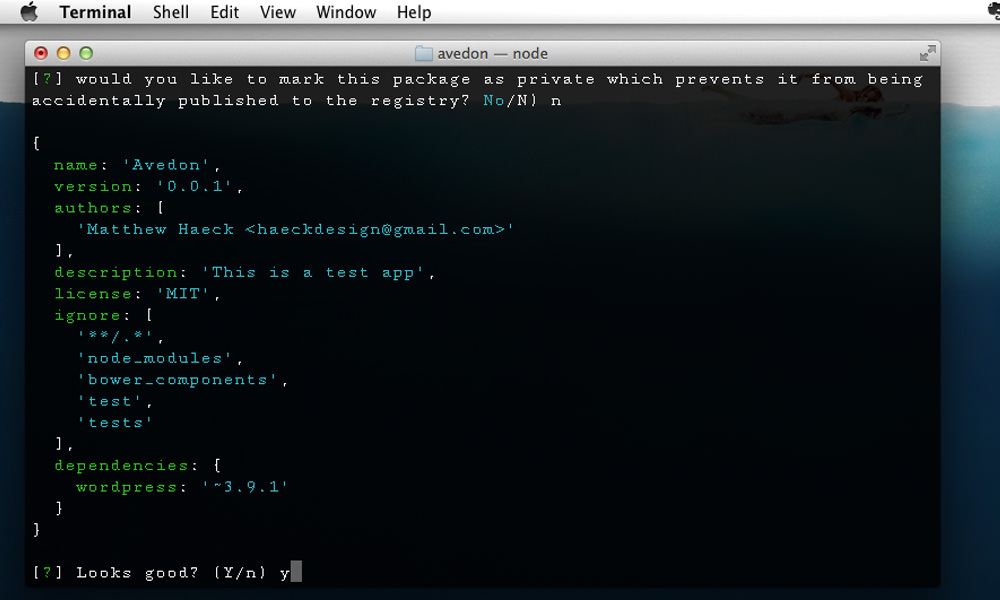
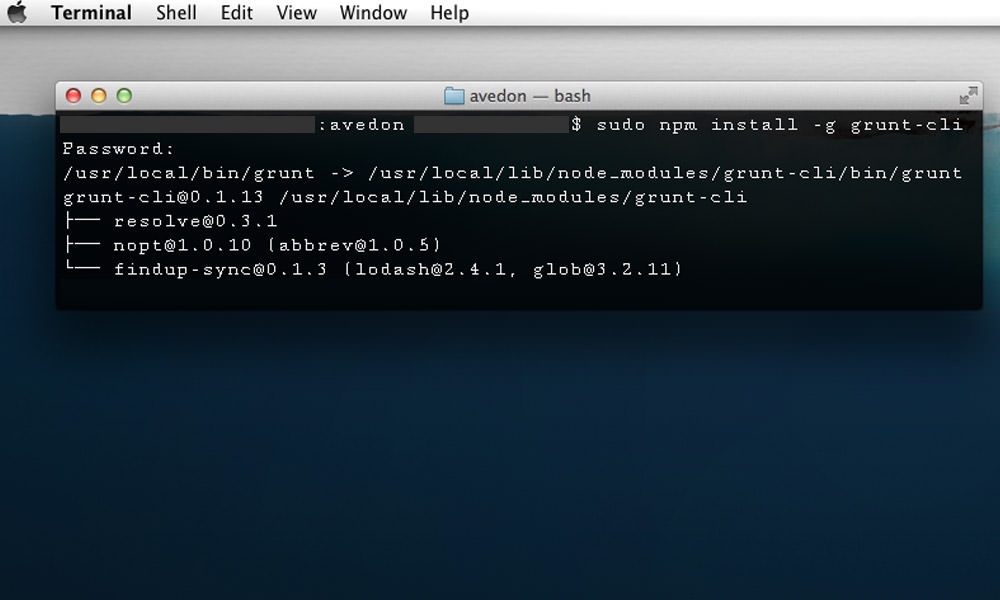
Grunt is a javascript based task runner. Basically it's sole purpose is to automate repetitive tasks like minification, compilation, unit testing, linting, etc. After it's been setup, it will create two files package.json and Gruntfile. Those files will be used to compiling your code and run basic "sanity" tests to ensure everything you build will function properly.
npm install -g grunt-cliTo preview an app you're working on, run
grunt serveand you'll get an immediate testing version popup. To run the tests you've configured, usegrunt test. Most importantly, to build your optimized project simply rungruntand watch the magic happen.You may run into a couple errors initially, but once you've got things properly setup Grunt will become a clutch asset. This is the tool that turns your frayed code into a minified marvel (and it even handles your CSS preprocessing!).
Documentation -
Gulp
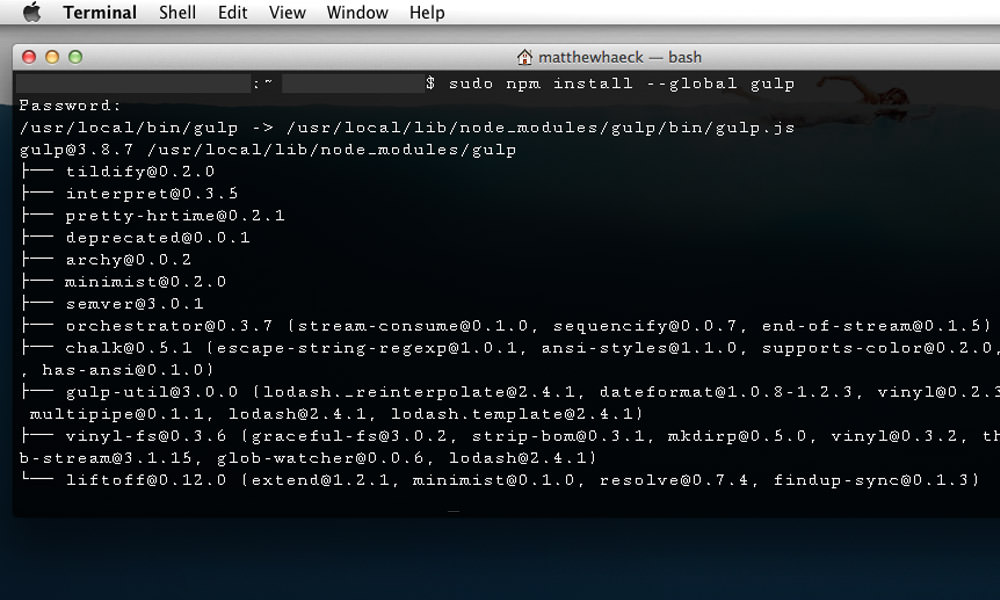
If Grunt isn't your "cup of tea", the alternative you'll want to check out is called Gulp. It works very similarly to Grunt, but it uses a "code-over-configuration" which makes it a little easier to start using for most people (basically, there's just less setup). If you'd like more detail on the distinctions between the two, give this post a look.
npm install -g gulpSince Gulp is more of an alternative then suggestion, I won't go into to much depth. This cheat-sheet will be useful, but the basic codes are fairly simple. Run
npm install --save-dev gulpto install locally. Usegulp XXXto run a task andgulp XXX XXXto run multiples.Gulp has enough of a following to be worth the mention, but it won't add any functionality beyond the Yeoman, Bower, Grunt combo (at least, that I'm aware of).
Documentation
If you're looking to master this Yeoman, Bower, and Grunt based workflow, I'd recommend taking a look at this tutorial from Newtriks, another from Treehouse, and this workflow tutorial from Tutsplus. If you can grasp the previous summaries along with these tutorials, you should be off to a solid start with these command line assets.
To Be Continued... Since these tools introduce an entire new language of options, we'll need to cover the detail in a future web development tutorial. Hopefully the steps we've covered will have gotten you up and running with the command line utilities and the documentation links included above should be insanely helpful for you.
Use What you Know and Never Stop Evolving
Efficiency is a never ending process, but the benefits you reap can make every day of your work better. Make a serious commitment to integrating the workflow patterns you find effective and feel free to add any in the comments below if you think they're helpful. If you've found this workflow tutorial helpful, please be sure to share with the social buttons below and as always - Thanks for stopping by!
